The three steps
On first start the SRV-Manager guides you through: choose the database, set the master password, create the first admin. All workstations using the same database see the same resources, users and approvals.
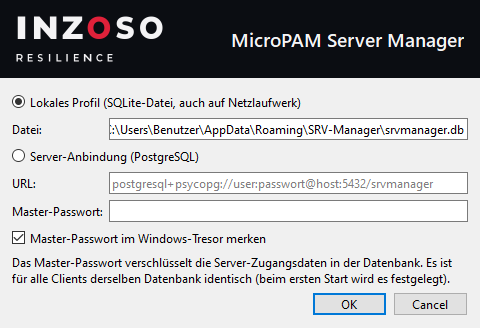
1. Choose the database
The “Datenbankverbindung” dialog offers two options:
- Local profile (SQLite): a file on this PC (default: %APPDATA%\SRV-Manager\srvmanager.db) or on a network drive. Suitable for a single workstation or small teams with a shared network drive.
- Server connection (PostgreSQL): a central database for several workstations. The connection URL has the format postgresql+psycopg://USER:PASSWORD@HOST:5432/DATABASE.
- With PostgreSQL the database (e.g. “srvmanager”) must exist on the server and be writable for the user. The SRV-Manager creates the tables itself.
2. Set the master password
The master password encrypts the server passwords stored in the database.
- On the very first start of a new database the password you enter becomes the master password.
- All further workstations using the same database must enter exactly this master password.
- “Master-Passwort im Windows-Tresor merken” stores it on this PC so it is not asked at every start.
- Important: The master password cannot be reset. Without it the stored server passwords are unreadable. Please keep it safe.
3. Create the first admin
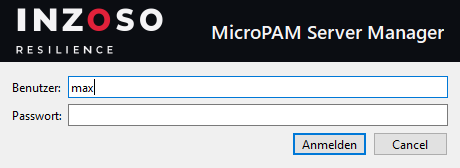
On an empty database the SRV-Manager asks for a user name and password (at least 6 characters) for the first admin. The sign-in follows. Create at least a second admin later.
Connecting more workstations
- Install and start the SRV-Manager.
- In the “Datenbankverbindung” dialog enter the same database and the same master password.
- Sign in with your own user account. It is already in the database.
Switching the database later
The profile is in %APPDATA%\SRV-Manager\profile.json. To switch, delete this file and restart the SRV-Manager. The “Datenbankverbindung” dialog appears again.